
 Magyar
In this post we will check how to create an custom action, which can be triggered by any entity and run a custom business logic.
What is a Custom Action
A custom action is a process which category is action. This action can be triggered with a custom message, can be independent from entities and can be run a custom business logic written in C# like plugins.
Creating Custom Action
Let’s see how to create a custom action through a simple example project. The business logic is as follows:
- We need an input parameter which can be any text.
- Our action will convert it to uppercase
- And the converted text will be returned as an output parameter.
Unlike the plugins, we do not code and register immediately, because the first step is to create an action typed process in Dataverse.
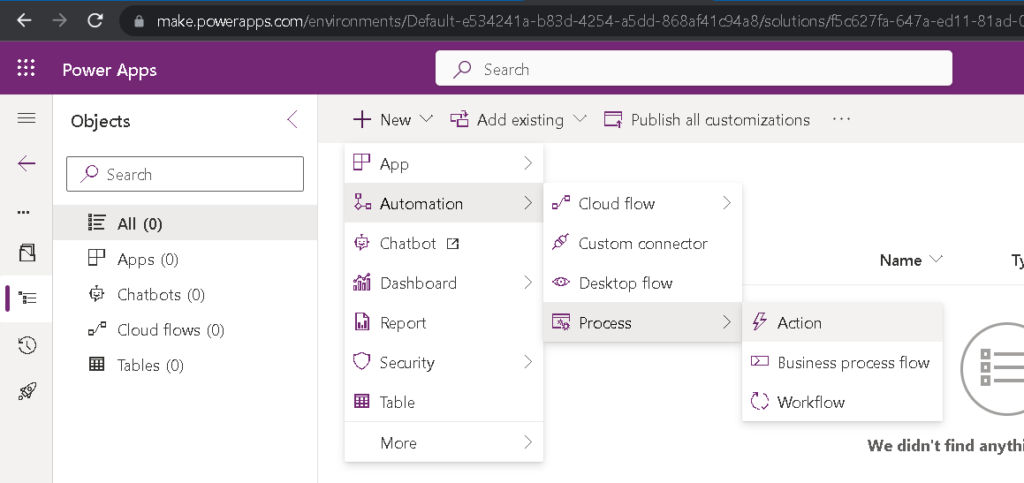
Let’s see this step-by-step on the maker portal:
- Create or select an existing solution,
- then select action through “New > Automation > Process > Action”:
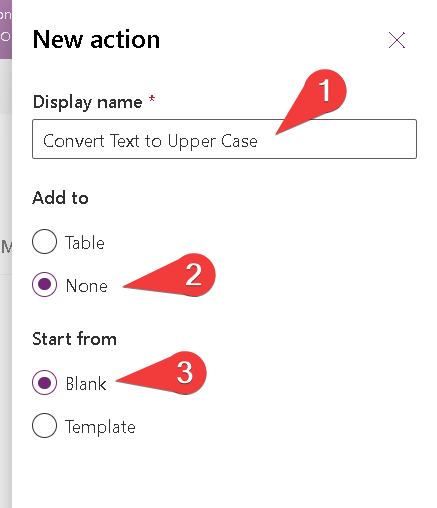
An action creation blade will be come in on the left, where we can provide:
- a name, which will be used for the custom message
- select “None” under option “Add to” which means it will be unbound to any entities, so it will be globally available.
Save it, and let’s see our new process:

Note that the name of the process is created from the “Unique name” and the publisher prefix.
- The type of “Category” is “Action”.
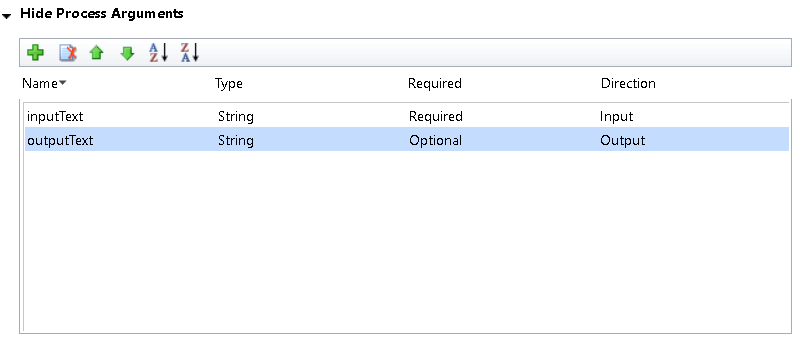
- Scrolling down downwards we can define the input and output paremeters. The type of parameters must be provided and they can be optional or required.
In our case the input parameter will be a text and the output parameter which will be the camel case text:
Keep in mind that name of the parameters will be used in the code. Now we need to activate the action by clicking on the button “Activate” located on the ribbon:

Business Logic
Let’s see how to write and compile our business logic in Visual Studio. First we need a project, see my previous post for further details. Now we can focus only on the code:
using Microsoft.Xrm.Sdk;
using System;

namespace kogerohu.Actions
{
    public class TextToUpperCase : IPlugin
    {
        /// <summary>
        /// Action to convert an input text to upper case and return
        /// </summary>
        public void Execute(IServiceProvider serviceProvider)
        {
            IPluginExecutionContext executionContext = (IPluginExecutionContext)serviceProvider.GetService(typeof(IPluginExecutionContext));

            var inputText = (string)executionContext.InputParameters["inputText"];

            if (string.IsNullOrWhiteSpace(inputText)) return;

            var outputText = inputText.ToUpper();

            executionContext.OutputParameters["outputText"] = outputText;
        }
    }
}
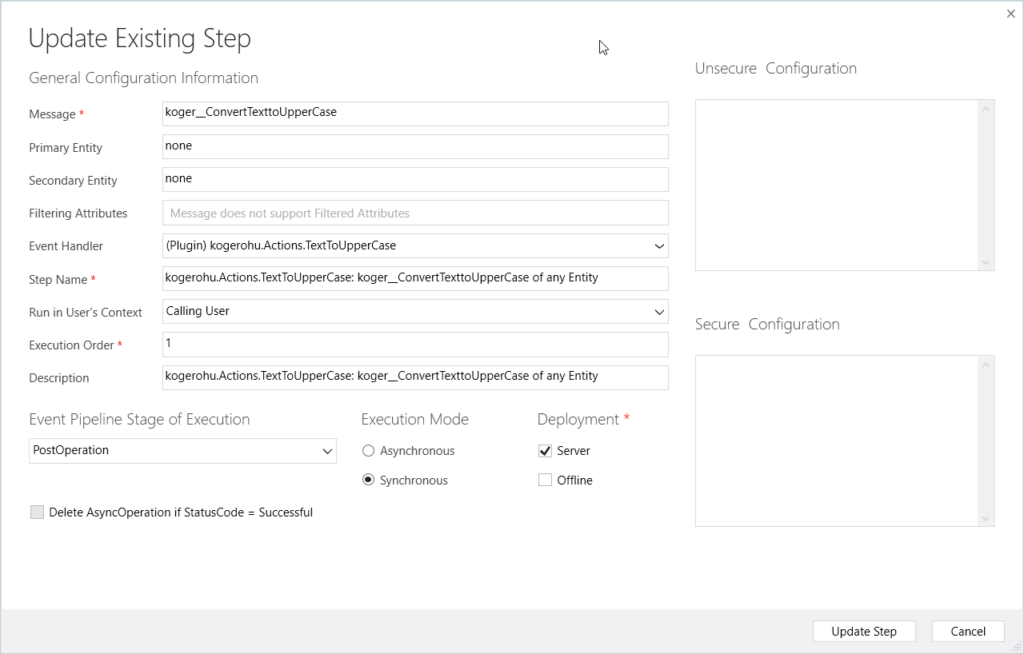
After building our code, uploade the assembly according to the method presented in this previous post. Important difference is that when you set the “Message”, then you need to provide the unique name of the process itself. We do not have to set a primary entity, because we defined our action as global (unbound). Also do not forget to set the stage as post operation:
That’s it, our plugin typed custom action is ready to use. Now it will be triggered and we can also call it from JavaScript, as workflow step or in Power Automate as unbound action.
The source code with the VS project is available on my GitHub page.
Source

Leave a Reply